
A few weeks ago, I promised a short post on some Beginner’s DIY Decorating for home parties! So I’ll get right to it: here are just a few of my favorites (in no particular order) with pictures included. (Visual aids make my life so much easier, so I thought I’d do the same for you!)
1. Collect a ridiculously versatile collection of patterned paper:
You’ll never know what colors or patterns might fit your occasion, match your décor, freshen your party, ring in the season, etc. etc. But craft stores like Michaels’, Joann’s Fabrics and Hobby Lobby, can help you out if you visit their scrapbooking sections. These stores usually carry myriad options of patterned paper for under a dollar each – you can collect a few each time you visit and stash them away in a container in the closet when you're not perusing your options. Here are just a few ideas for how to use said papers:
a. Placemats for table settings: it’s an easy and incredibly creative way to dress up any table setting using your patterned paper under dishes, silverware, etc. etc.
b. Place cards: instead of buying expensive ones, make your own with unique patterned paper you have at home: easy as pie (especially if you purchase the paper cutter and card scorer described below!) I often type a word document with names or quotes I want for the occasion and print it out – in turn splicing that and using double sided tape to attach it to the patterned paper. (I love the font options and sizes in Microsoft word, too – it allows for a variation not easily achieved by my own handwriting!)
c. Confetti: craft stores have lots of paper punches of all sorts of shapes, sizes and styles. Scatter confetti over a bedspread for Valentine’s Day, (the Vacuum scoops them all up!), add them to a birthday table or sprinkle them into a gift bag.
d. Food labels: again, use paper cutter and scorer to assemble labels for food, or attach them to toothpicks and pierce the tops of your cupcakes on the dessert table.
2. Buy a paper cutter and Paper Scorer:
These are life savers – cutting paper by hand is not only insanely time consuming, it’s stressful! Trying to achieve a clean edge with a pair of scissors is exhausting and supremely frustrating. I recall all too well the story my mother told me about her traumatizing experience as a little girl in kindergarten: her teacher had her small pupils cut out hearts from construction paper. But my poor mother agonized over the imperfect edges so much, that she continued cutting until she realized that she only a shred of paper left. Many tears ensued. So since no one wants misshapen hearts and tears in their lives, these two tools are inventions of a most miraculous kind – don’t miss out on the magic! (Although I must confess that they cannot shape paper hearts for you.) The paper scorer, in turn, allows for straight, clean edged folds to occur effortlessly. Using simple inches and centimeters, the tool allows you to find the fold of your paper without guesswork, and a simple sweep of your hand with a small popsicle-stick sized tool creates the swift crease you need to fold the paper over without the lumps or uneven edges. A few examples of creation with these tools:
a. Food labels: (See above!)
b. Place cards: (See above!)
c. Making gift boxes for party favors: as long as you’re willing to do a little math, (or let’s face it, watch a youtube video!), making those cute Martha Stewart boxes you always study enviously on a magazine page becomes not only possible, but a very cheap way to add charm to a party for your guests. After all, it’s only paper!
d. Gift tags: easy and fast with a paper cutter -- using patterned paper as a backdrop to the tag is a delightful way to spice it up. Gift tags are lovely for parties involving gift exchanges. Or try doubling them as clever versions of food labels, place cards, (like tying a gift tag with a ribbon to a fork placed on top of a plate), and so much more.
e. Truly, in short, the ability to use paper in your decorating hacks is a great blessing and these tools (and having a collection of patterned paper as well), make that ability so much easier.
3. Save your calendar Pages:
Whether a wall calendar or desk calendar, the images on these pages make fabulous “mood settings,” and since they are simply composed of cardboard or paper, they are easy to adhere to surfaces or set on stands for different occasions or different times of the year. The great part is, if you get tired of one, just switch it out for another! A few ideas:
a. Put these on Easels: they make great statements and draw the eye immediately; The vertical angle of the image allows our eyes to notice it both quickly and often.
b. Use them as a part of your own inspiration board: (Disclaimer: this tip is not party related, but I had to mention it because it serves as a great pick-me-up for me!) Cut images out (again, easy with paper cutter) and either adhere them to a poster board with your favorite quotes underneath, or put them on your office bulletin board to bring you repose when you are stressed.
c. Paste the desk calendar images to solid colored construction paper and place them at your guests’ place-settings: they will serve a purpose unique to each guest since the images on each page will be different. Or you could use the pages (assembled the same way) to add a nuanced visual interest to your table that inspires a lively conversation – especially since some desk calendars simply exist to give you 365 days’ worth of cartoons or jokes! Great fun at a dinner party.
d. Scavenger Hunts: Depending on the calendar you are using, there are lots of creative ideas to turn these pages into interactive games! This is fun for kids, too, and can be a great learning experience at a kids’ party. For example: let the children find a hidden page and then have them talk about the things they see on their pictures or try to draw the image, etc etc. (I love adding secret messages to the back of each image and creating a game out of that!) So many themes and symbolic teaching moments can be drawn from these scenarios simply by cutting out and saving your calendar pages.
4. Use easels and picture frames of all shapes, sizes and styles:
SO many things can be propped up or displayed on or in these. I have found many uses over the last year or two when I discovered how easily an easel or picture frame translated into a party hack.
a. Images to set a mood: (I used an old calendar page recently for my son’s baptism party that happened to bear an appropriate picture and quote.)
b. Quotes: I adore using these for quotes from authors like Agatha Christie when hosting a murder mystery party or as a motif from a bygone historical figure about the nature of gratitude during Thanksgiving dinners.
c. Messages: Though creativity is almost endless here, using an easel to give your guests instructions of various kinds is a very classy way to inform them of what they need to do when they walk through the door, (like removing shoes, giving them a “how-to” for a game, or telling them to grab a party favor on the way out). Part of what I love about these uses is that these sorts of messages are hard to miss, (their verticality makes them more obvious), so it takes pressure off you as host or hostess to remember to give certain instructions or tips.
d. Menu: It’s a fun way to get your guests excited and hungry when they can drool over what they are about to eat!
e. Party themes: You name it – anything to help visualize the theme of a party can make a wonderfully convenient and stylish décor hack!
f. And I’d love to give a shout-out to Etsy artists here –many of them will charge very small amounts to make custom signage for your party – your only requirement is to download and print it. (I take mine to Staples and never pay more than a dollar for a print.) Yay for artists and the internet!
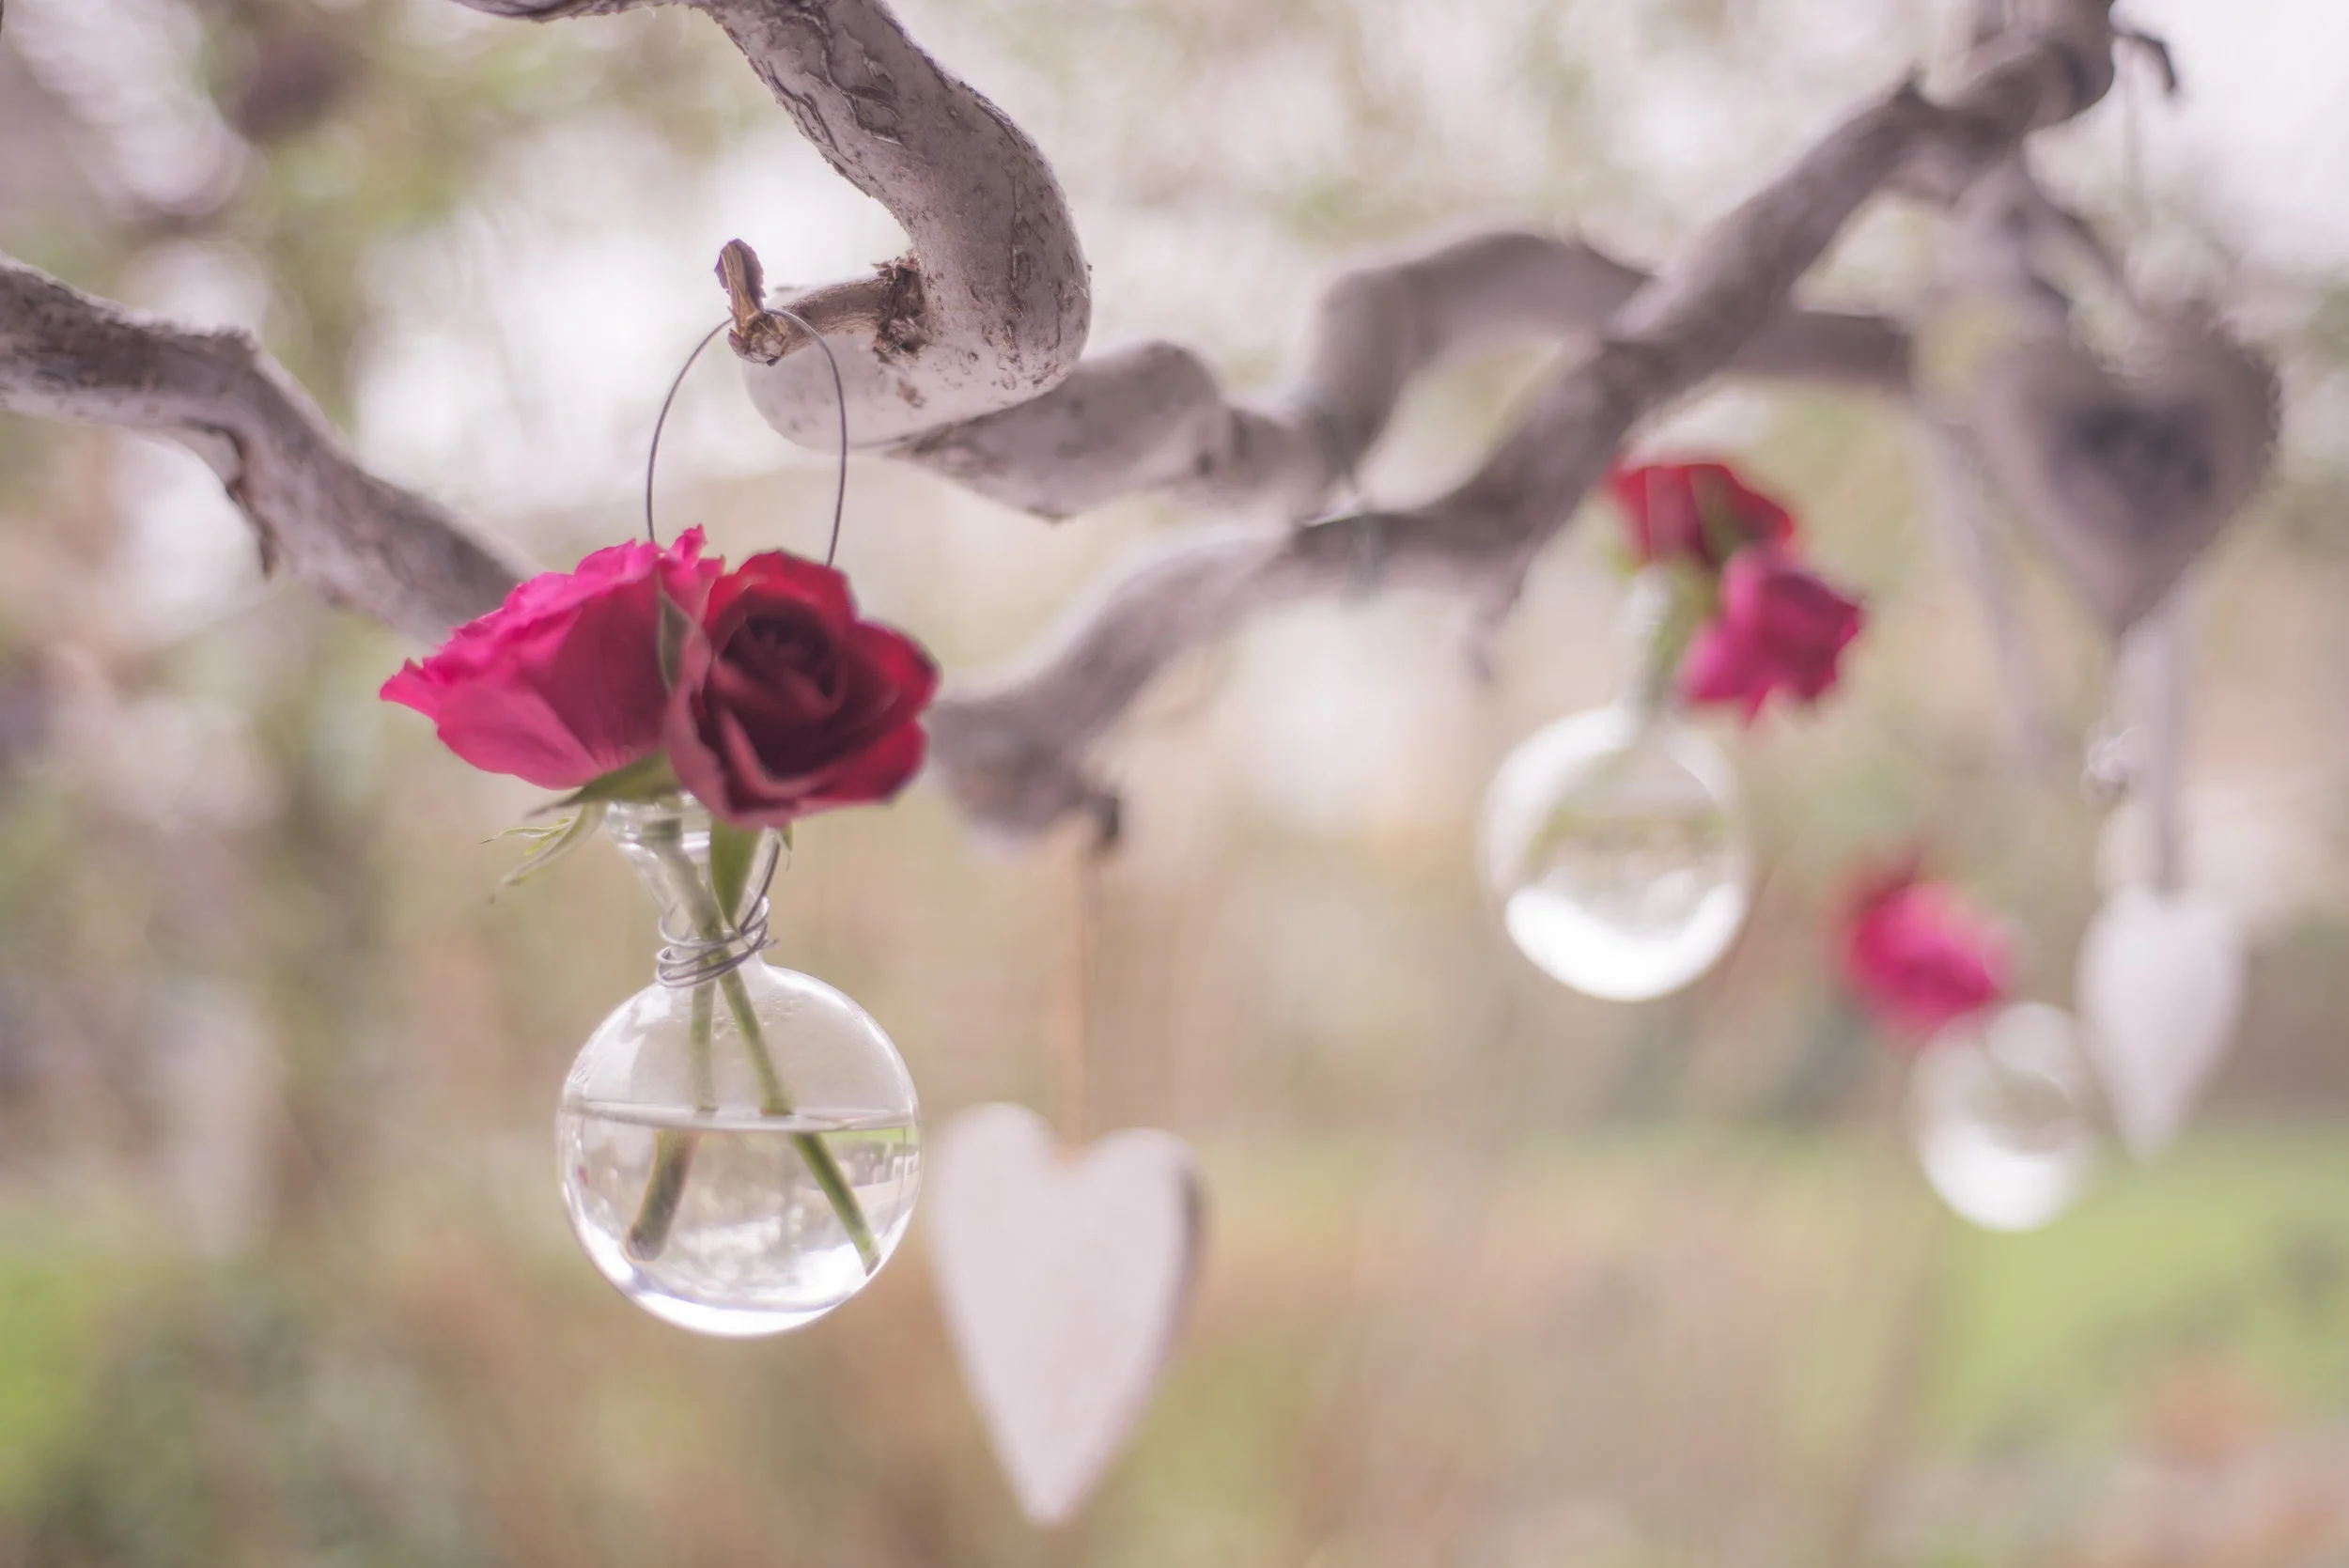
5. Accumulate various vases, bottles, jars and containers of all kinds and sizes:
You never know what they will come in handy for! This is one of my favorite décor tricks! They instantly add elegance. (And I love tying ribbon or twine to them!)
a. Flowers: Just like there are all kinds of different flowers, it is good to have all kinds of different vases and bottles of various heights and width of necks – not all flowers fit as beautifully into the same kind of vase! I love having all kinds of improvised vases handy because flowers have always been full of symbolism and many flowers are associated with a region, a tradition or a season; having the ability to instantly display ANY size/quantity of flowers for a symbolic occasion is a wonderful blessing. (Note: did you know that there is such a thing as a birth flower, just like there are birthstones for each month?)
b. Themed party helpers: For example; I used some jars during a coloring party to display a whole bunch of colored pencils. Candy, either for consumption, or as backdrops to a party, work wonderfully when housed in jars. Lidded jars or containers make great themed backdrops for gumballs, (child’s birthday party) peppermints, (Christmas party), black licorice sticks, (Halloween), and so on. Non-edibles include marbles or ticket stubs, (game night) plastic diamond rings (bridal shower), etc. etc.
c. Use them for utensils, straws or toothpicks: placing these in jars simultaneously classes up and simplifies the casual the friendly gathering.
d. Food displays: homemade cake pops, icing-dipped pretzel sticks, or candy-covered marshmallows that don’t always work well on plates work beautifully in jars or containers.
e. Place-setting enhancers: Bottles or jars of the short and slender sort make fabulous bud vases for individual place-settings. They will not only save cost by negating the need to buy massive bouquets of flowers, but your guests will love seeing their own personal-sized flower sitting there at their seat to welcome them to the table.
f. Centerpieces: Similarly, you can use all your different narrow-necked bottles, jars or vases to use as bud vases in the center of your table – it's an easy no-effort centerpiece; all you need to do is purchase a few flowers and place one or two in each jar.
So there they are: the simplest party hacks for beginners that glamorize a get-together with little to no effort! I hope this was helpful. I encourage you to at least try one or two of these and see what you think! I have found them wonderfully helpful and even fun to assemble, and these have all become my go-to’s when I am running low on inspiration. Good luck!